Step 2 : List of Items/Tools


Remove the foam board and unbox the machine from the packaged box.
Remove the zip tags near the extruder (Print head) and the foam over the Display screen.
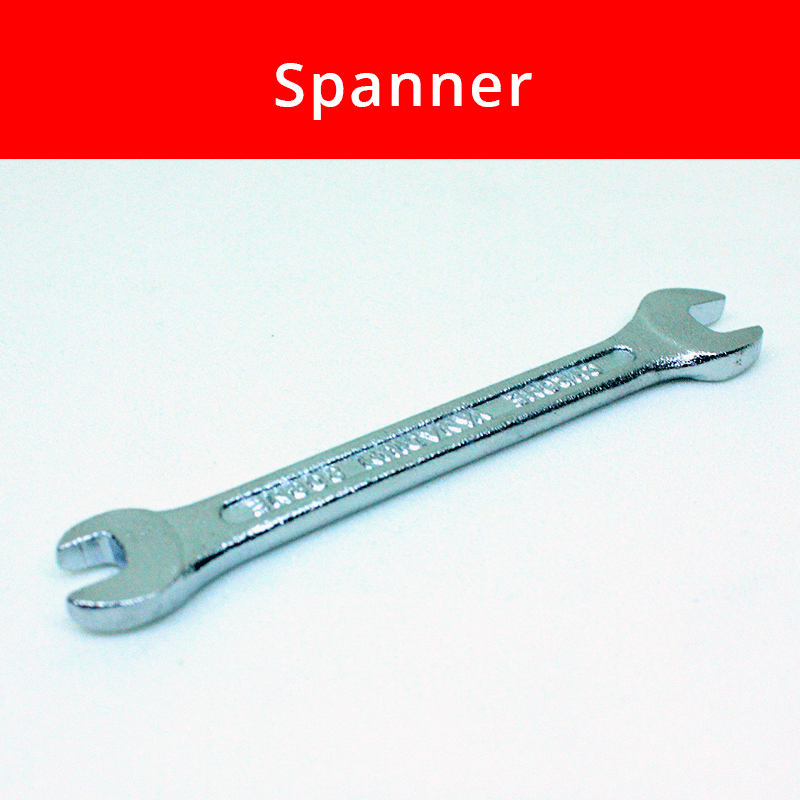
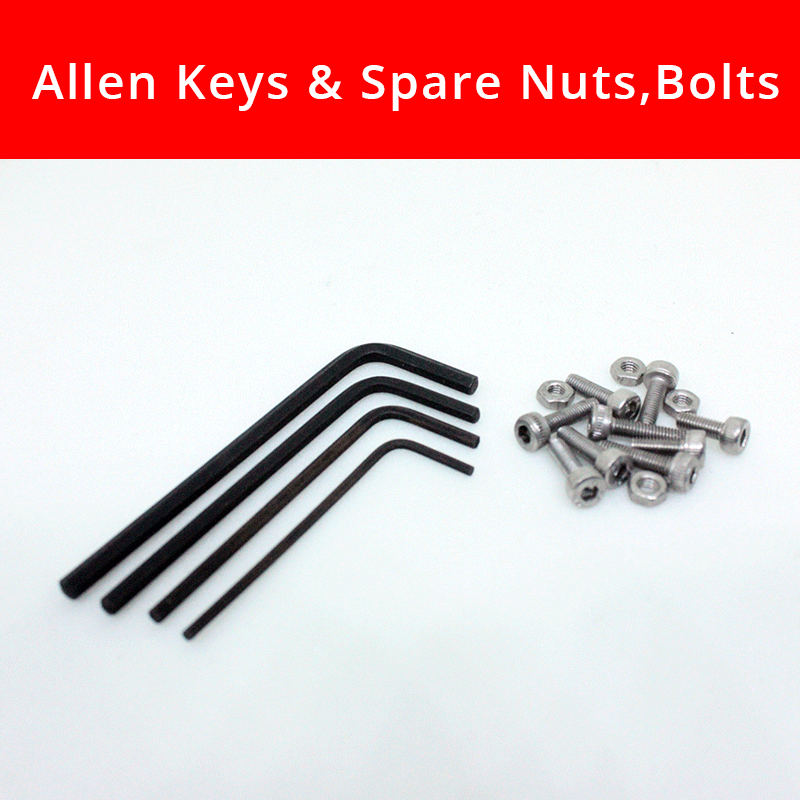
Take out the Tools Kit kept inside the machine (under the Print bed).
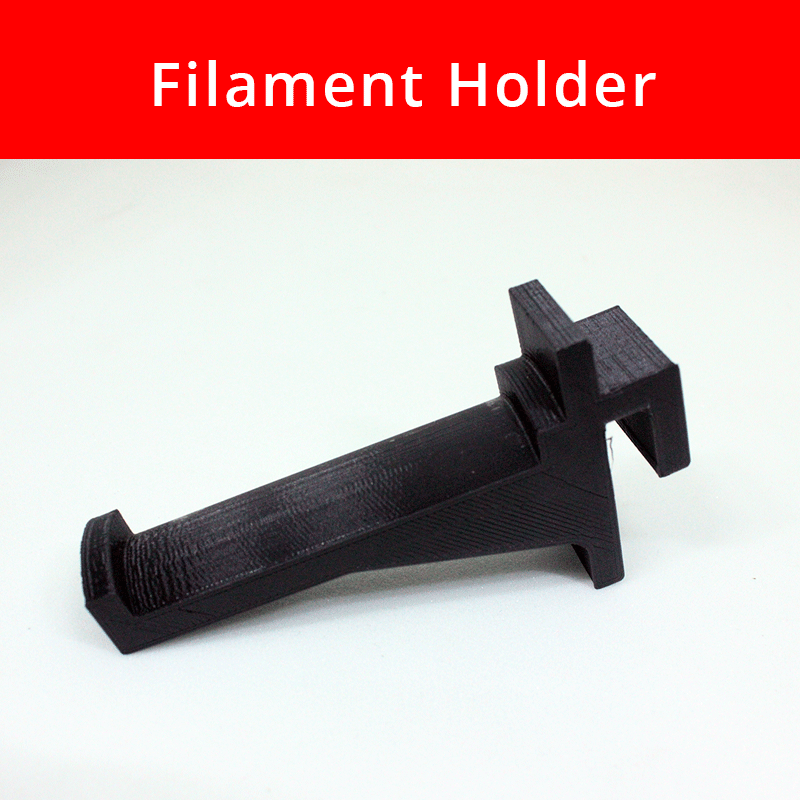
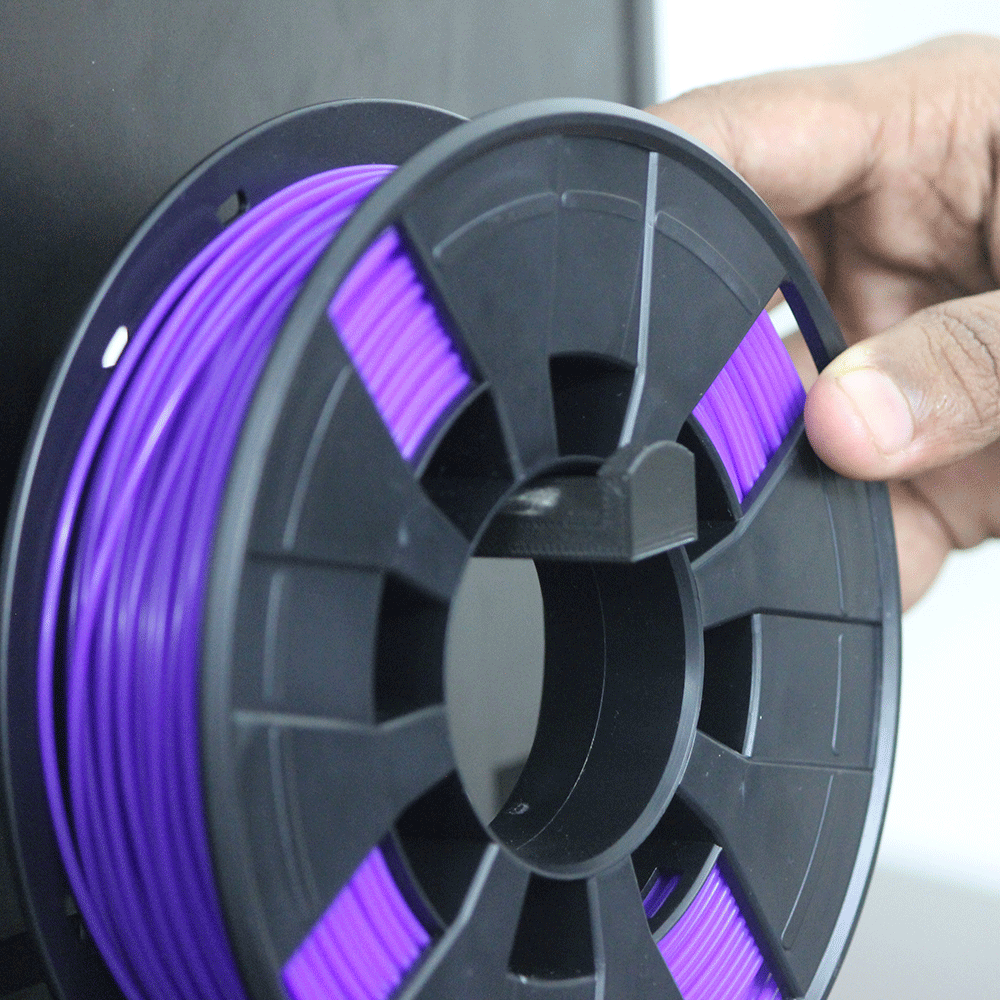
Fix the Filament Holder in the square hole on the back of the printer and place the filament in it such that its loose end is on your right side.
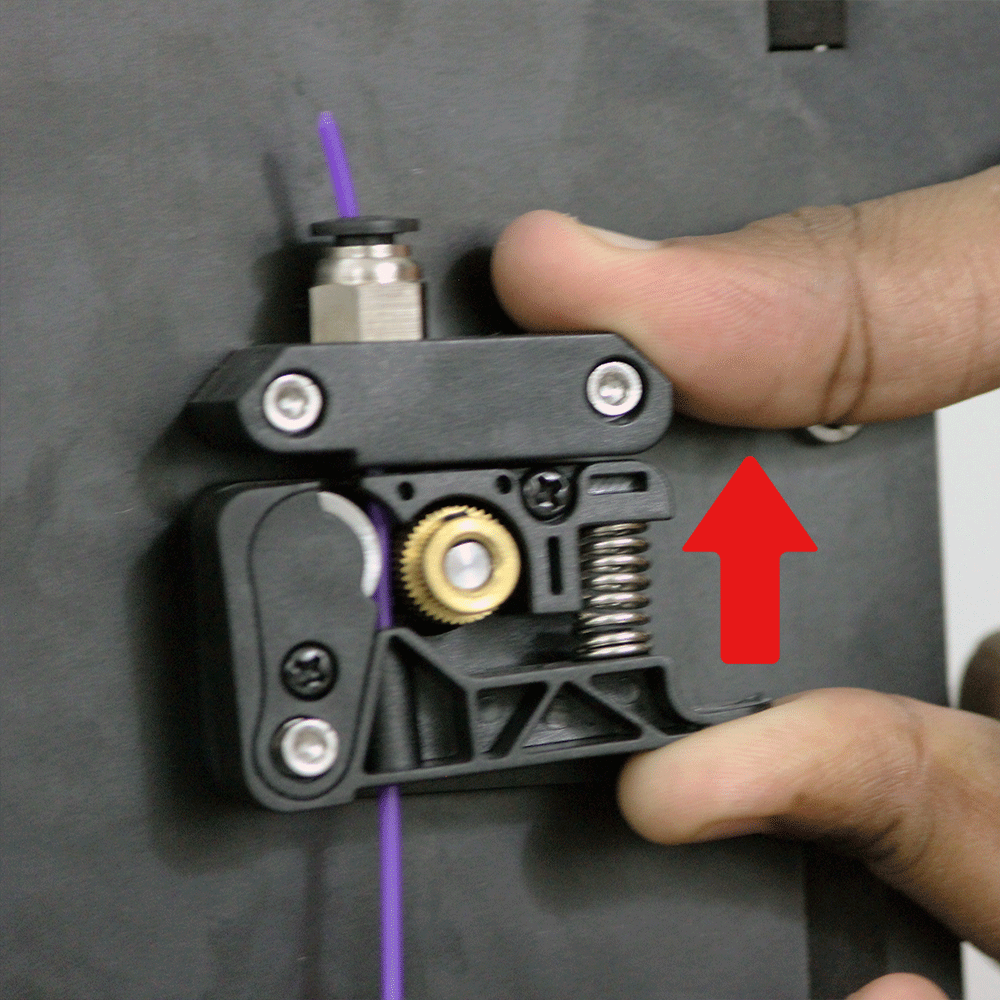
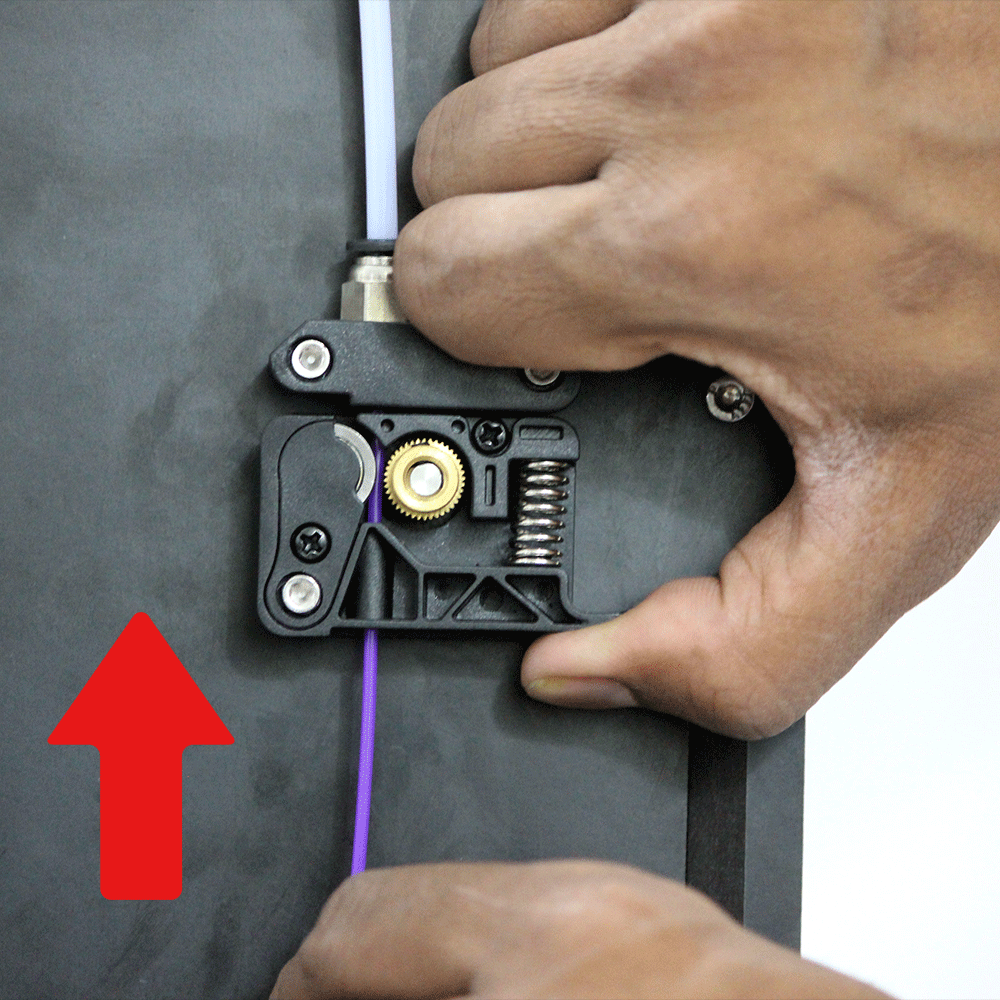
Take the loose end of the filament and load it into the Bowden (feeder) by pushing the spring upwards such that the filament comes through the top side.
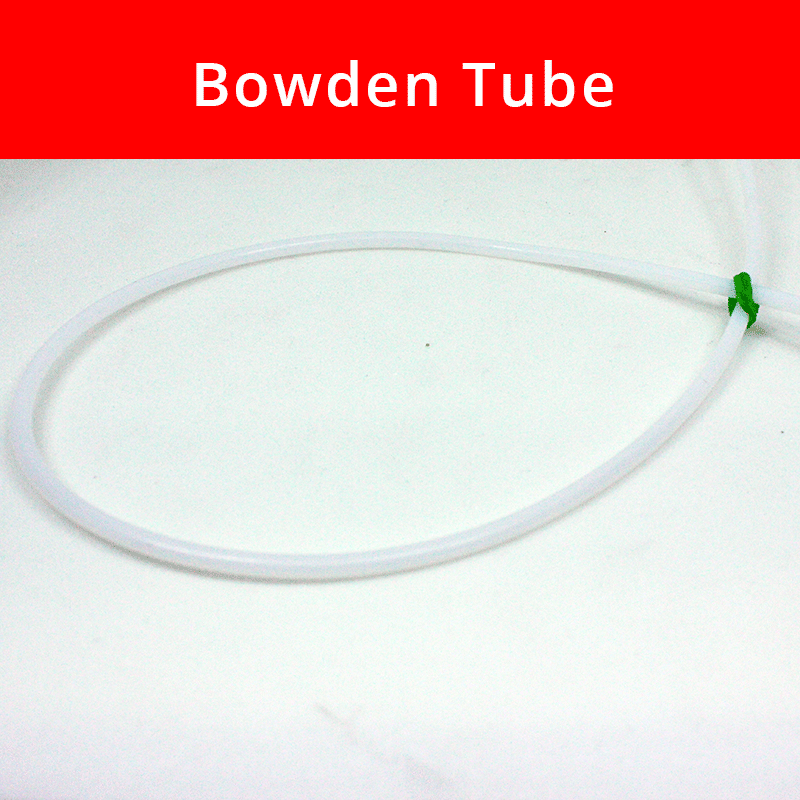
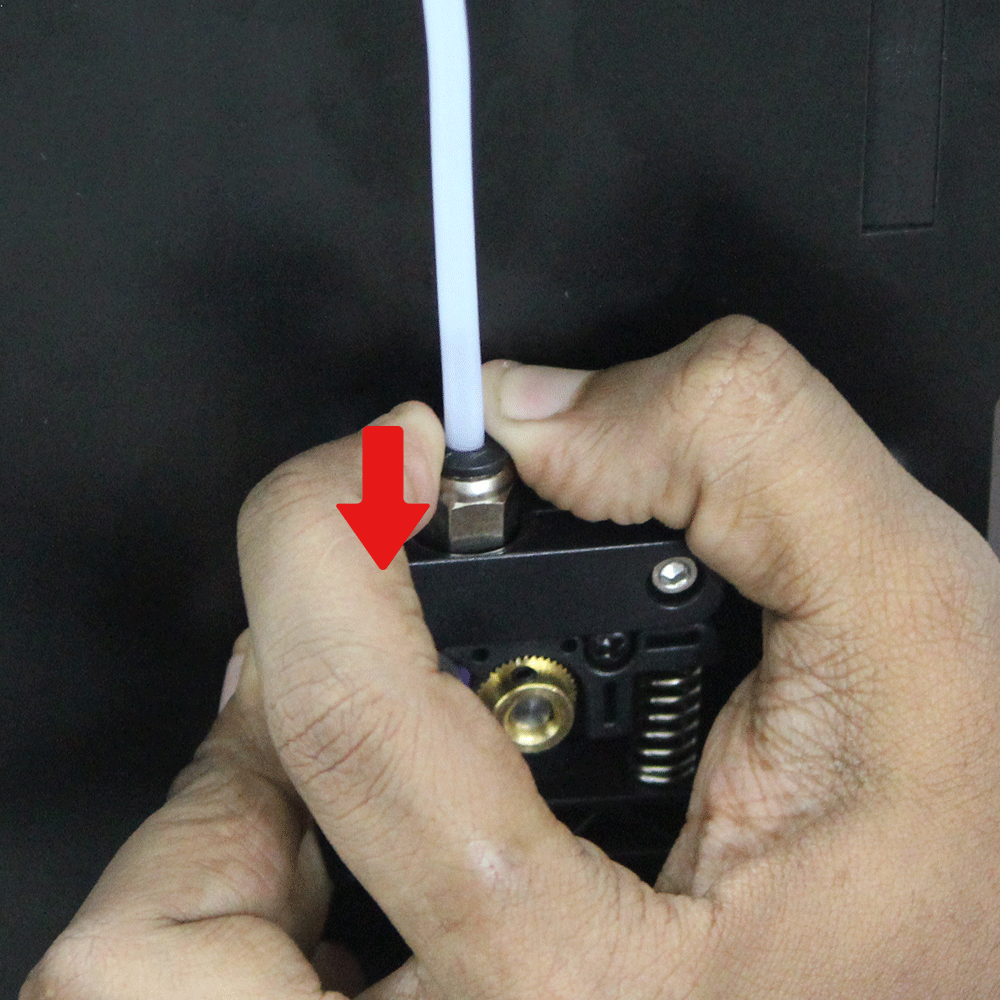
Take one end of the bowden tube and push it down into the feeder. Make sure it has been pushed all the way in until it gets locked.

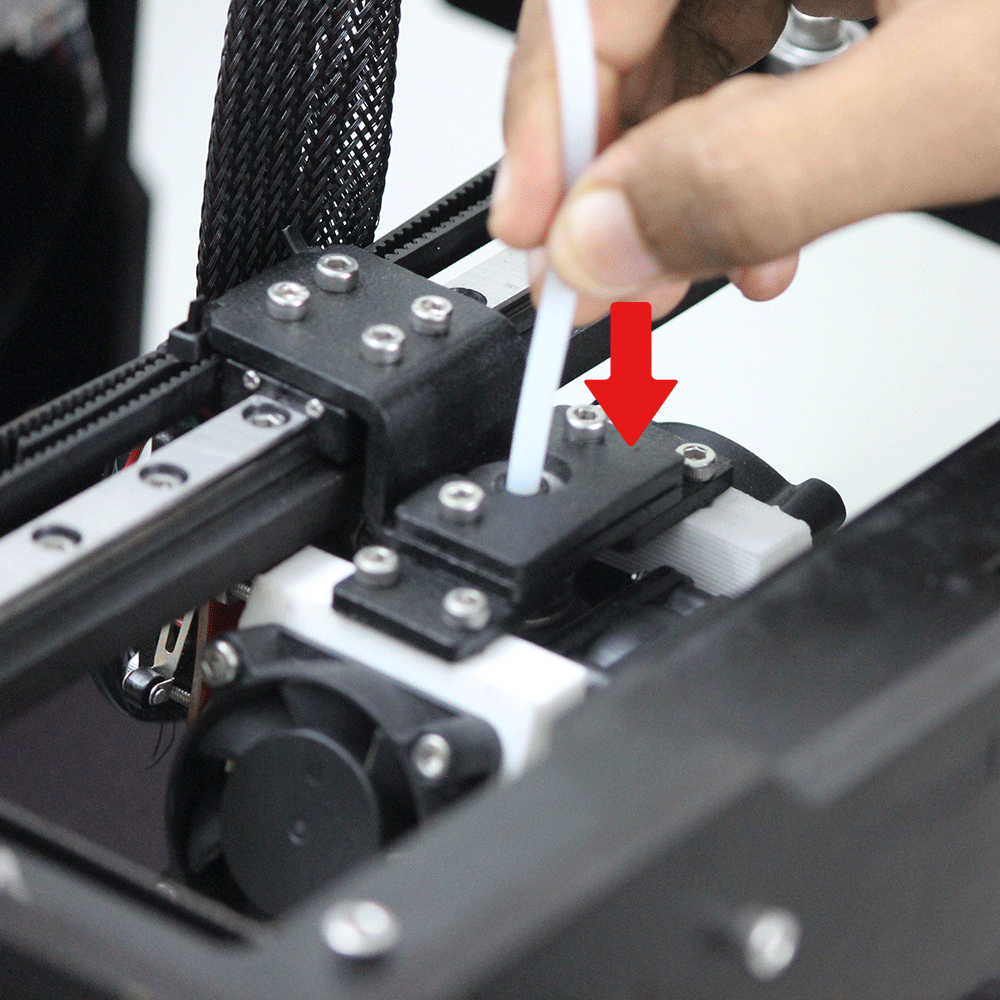
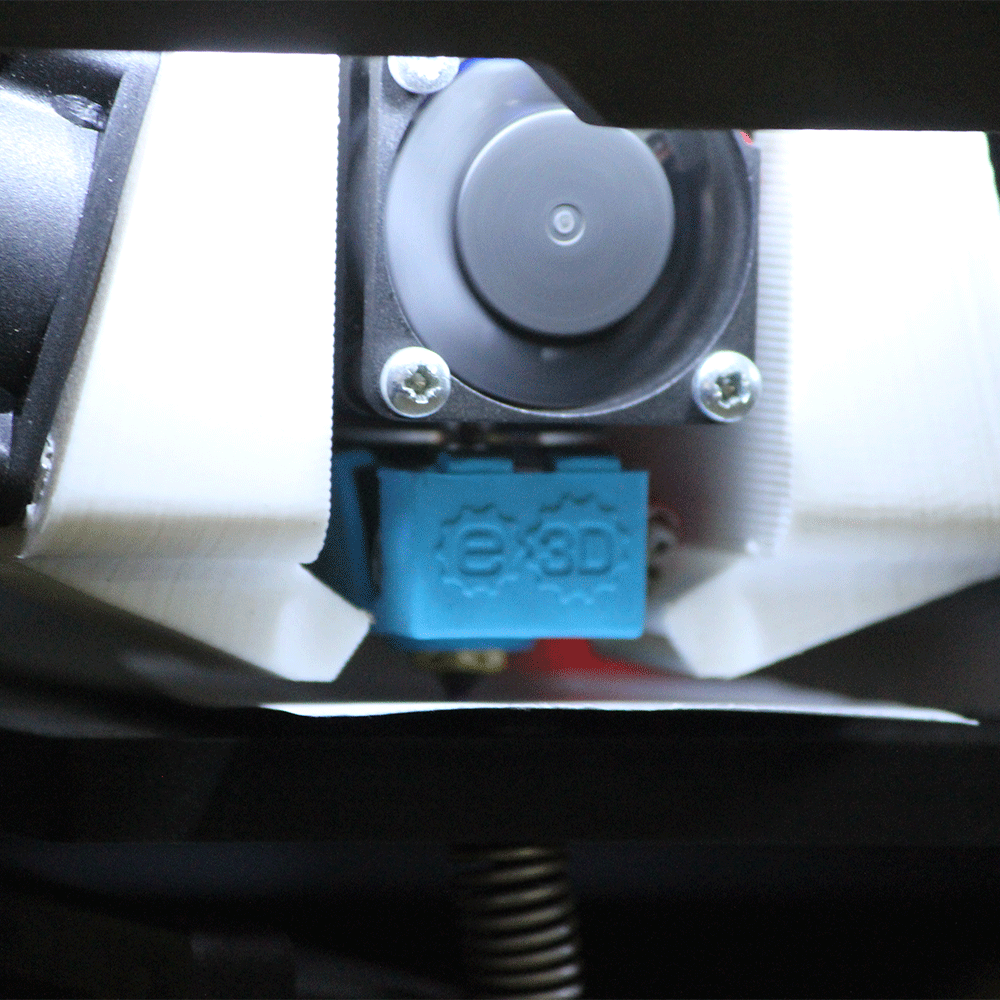
Take the other loose end of the bowden tube and push it into the extruder (print head) from the top all the way in until it gets locked.
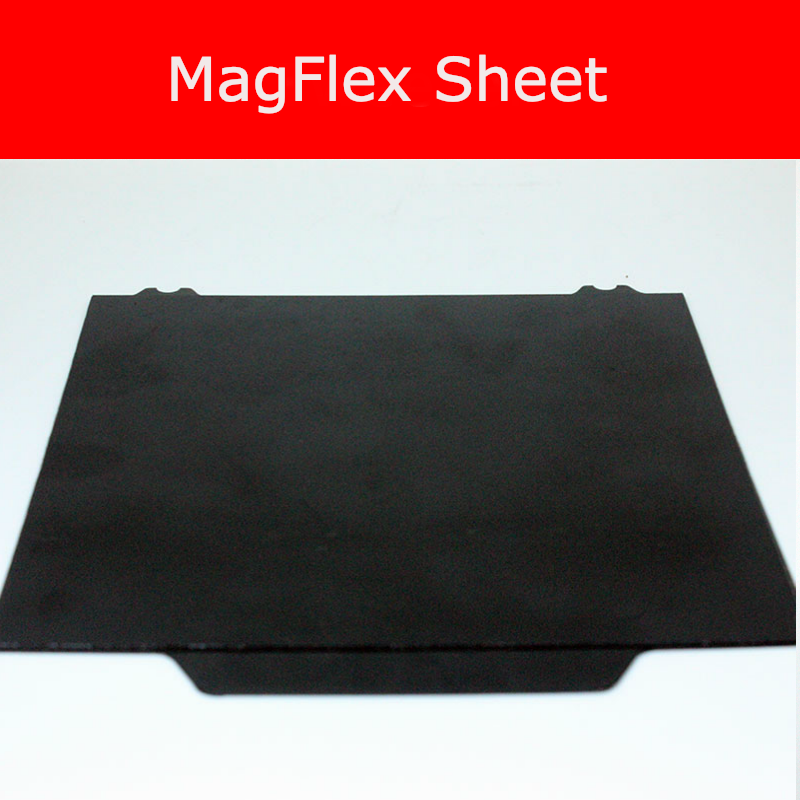
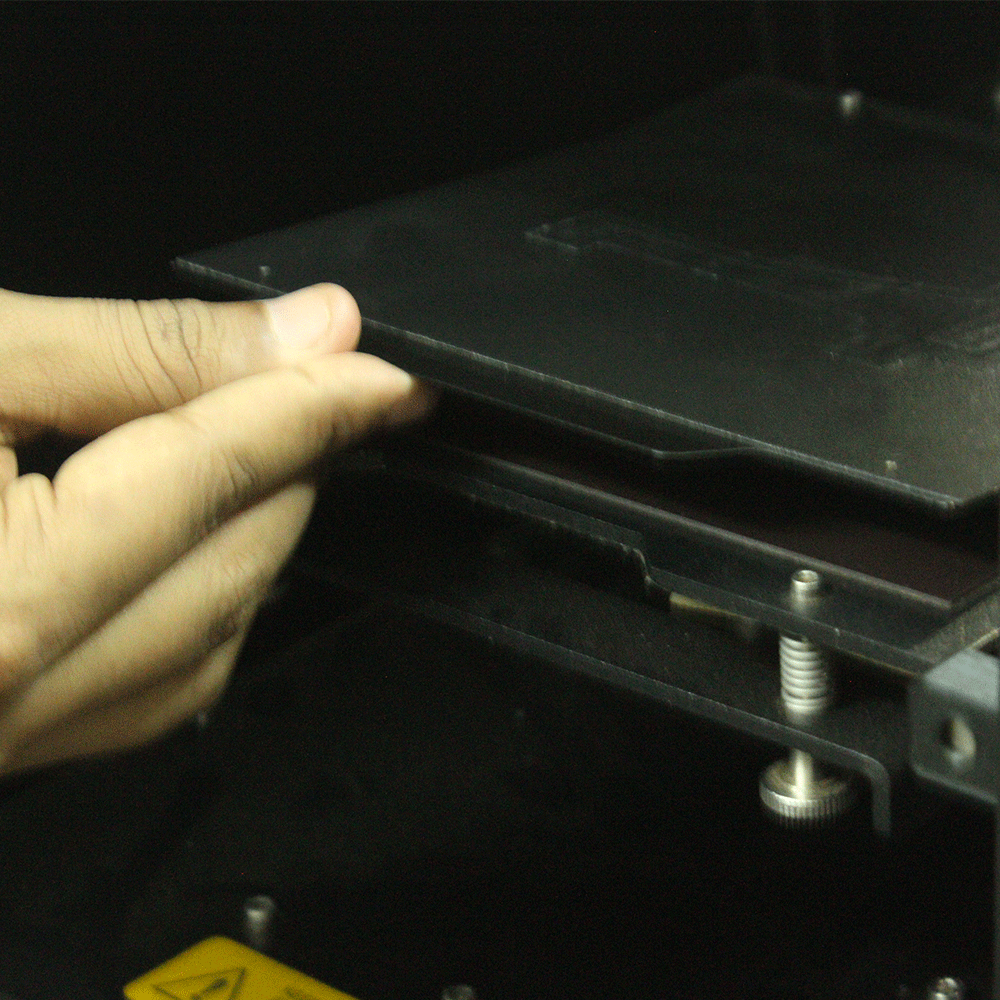
Place the MagFlex on the print bed such that it fits in with the build platform (print bed).
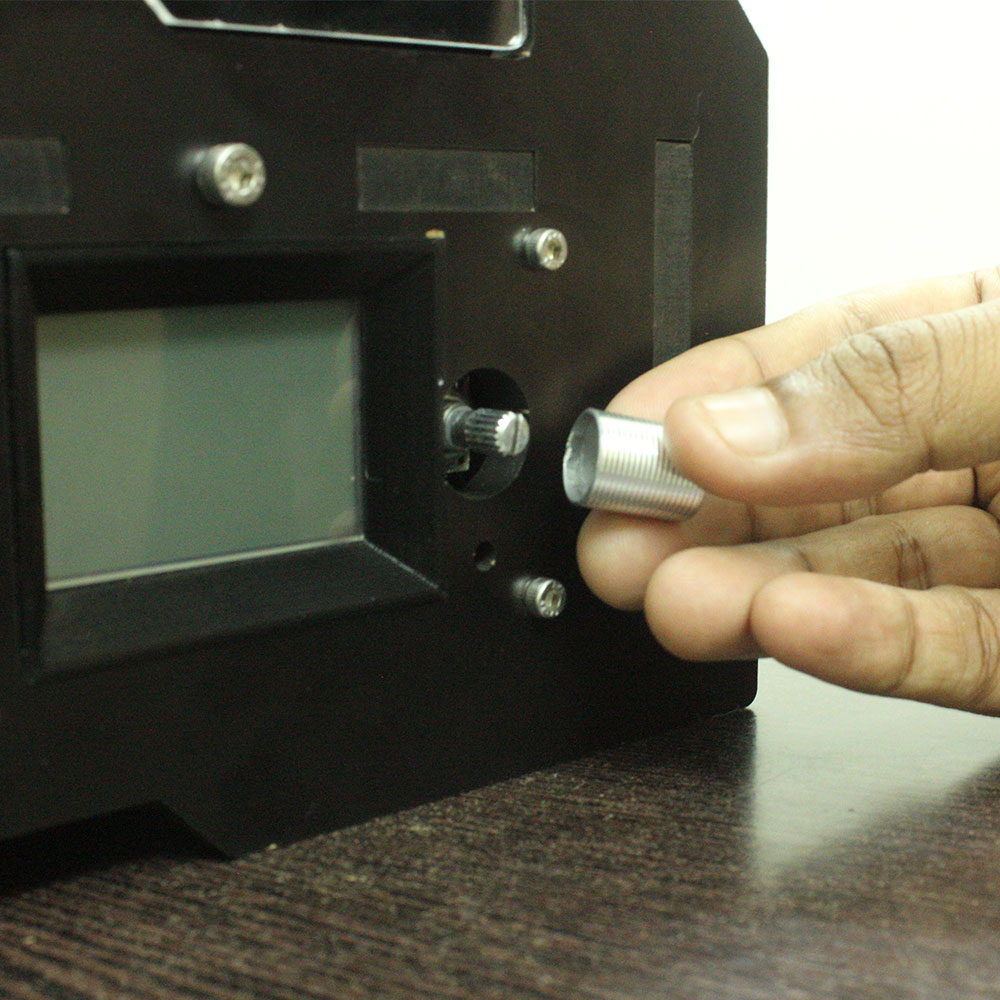
Take the Display navigation knob from the tool kit and fix it near the display in its place.
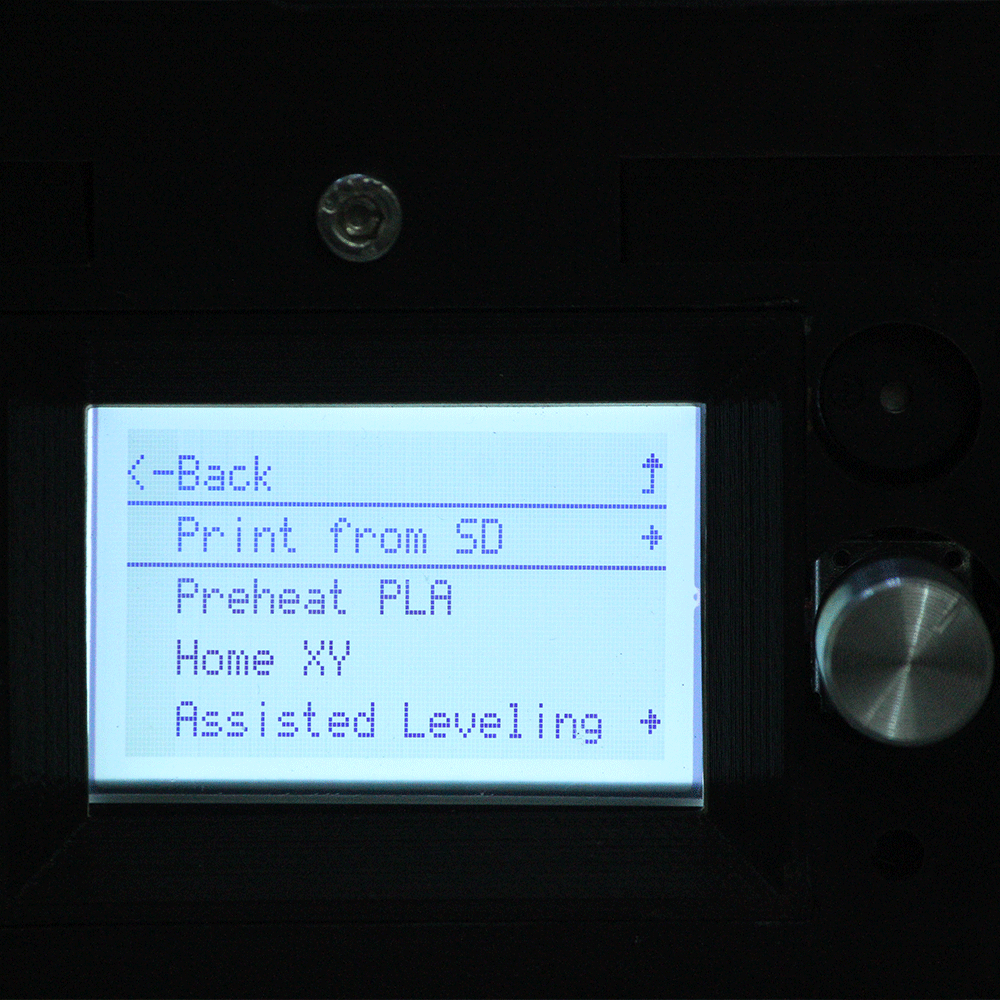
Pressing the knob → to go into the main menu or to select an option.
Clockwise Rotation → to move down.
Anti-Clockwise Rotation → to move up.
Copy the files from the SD Card into your laptop/PC for backup.
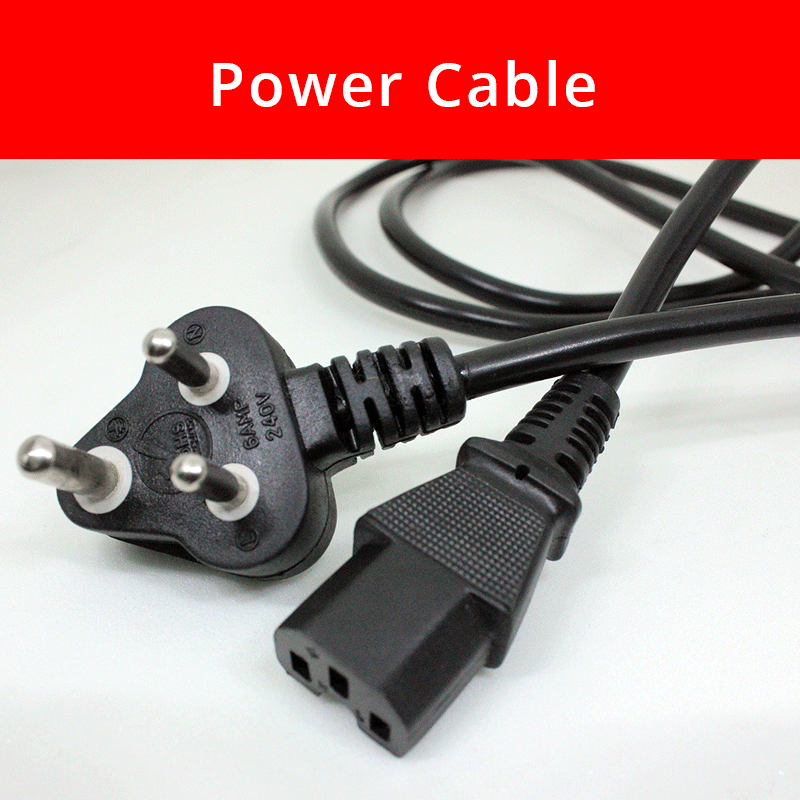
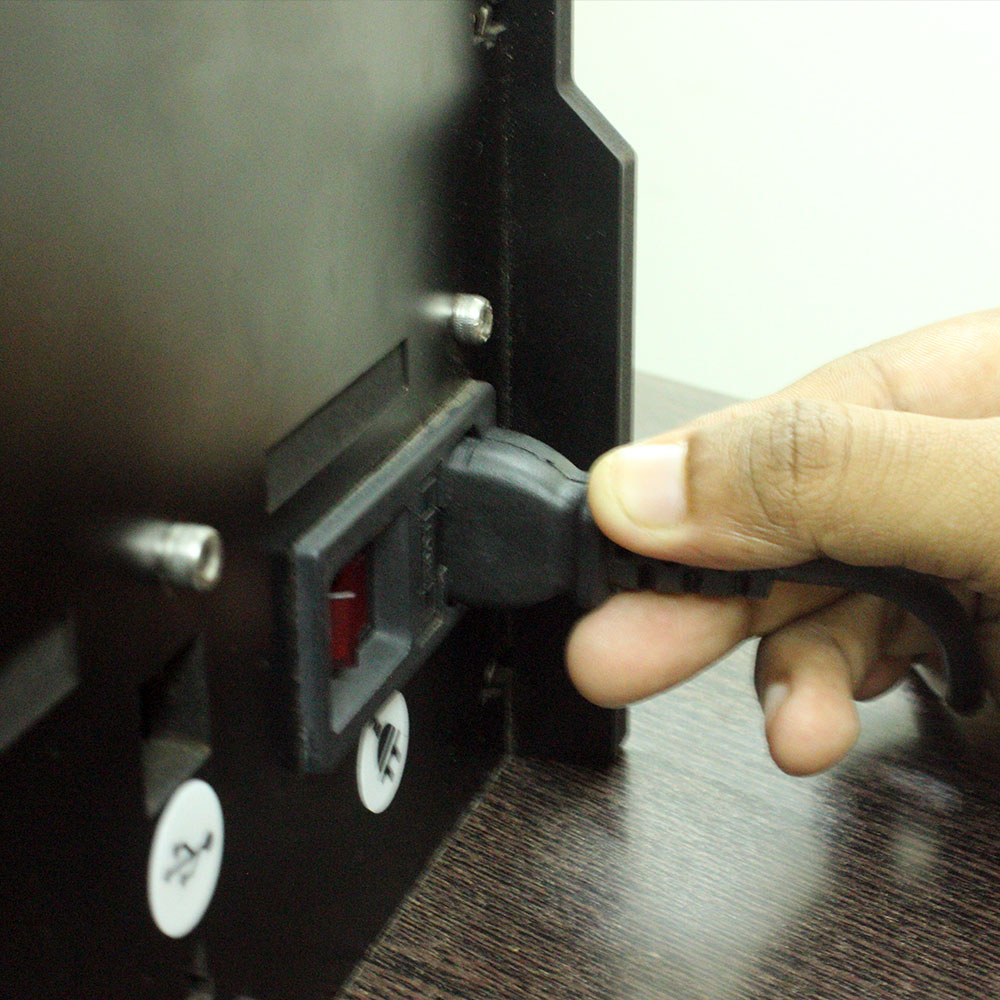
Connect the power cable to the printer. Go ahead and turn ON your printer.
By default, all the FabX Printers are been factory-calibrated for Bed-leveling. But there are chances that the leveling may get changed during transport. So, it’s better to make sure that the bed-levelling is correct before starting the first print. This will be a one-time process only.
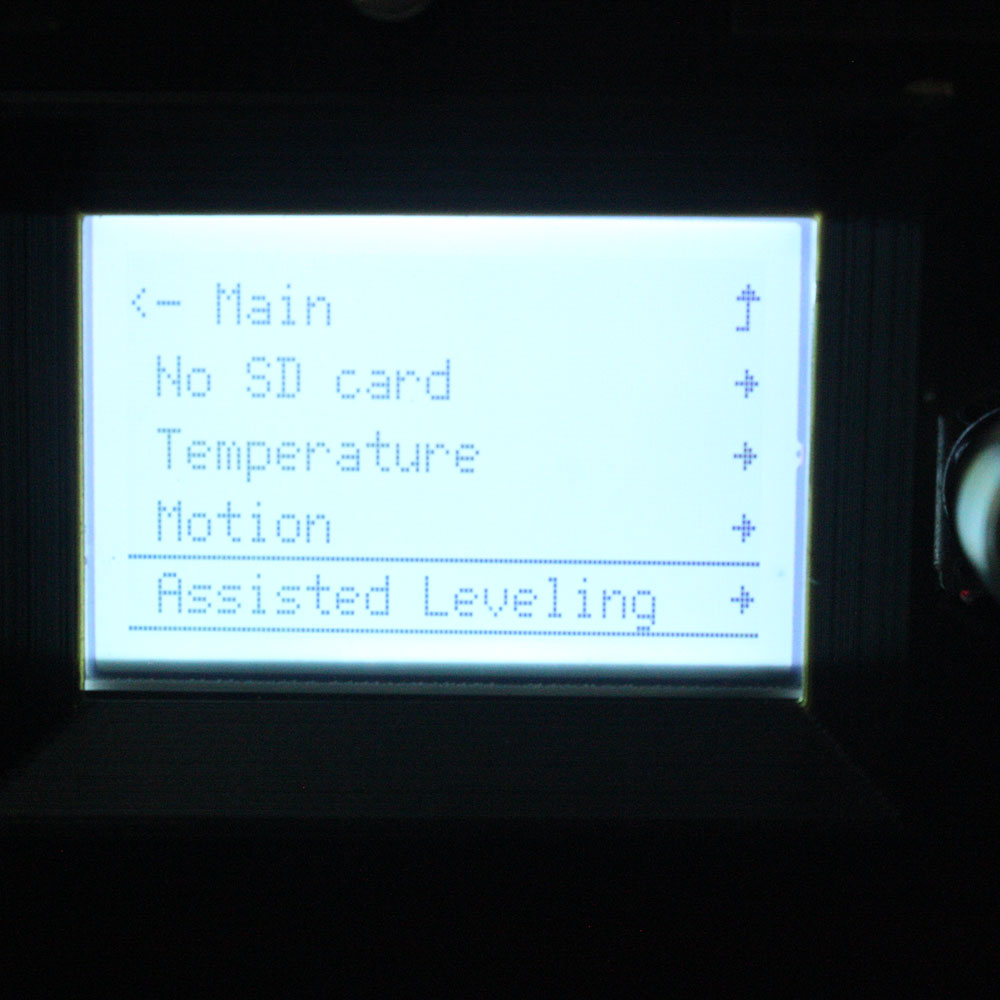
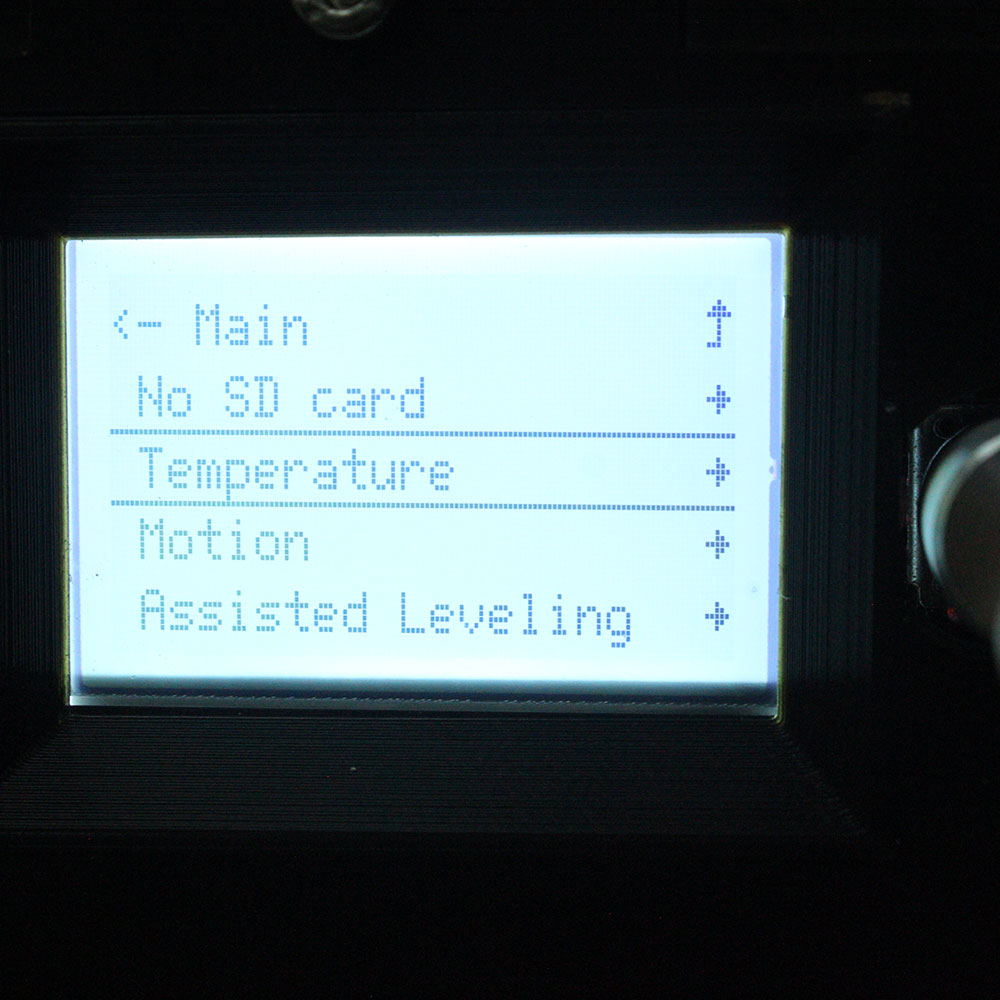
To check your bed levelling, press the display knob once and then scroll down to select Assisted levelling. (You can see that the printer will move to its home position and then to a nearby corner - 1st corner position)
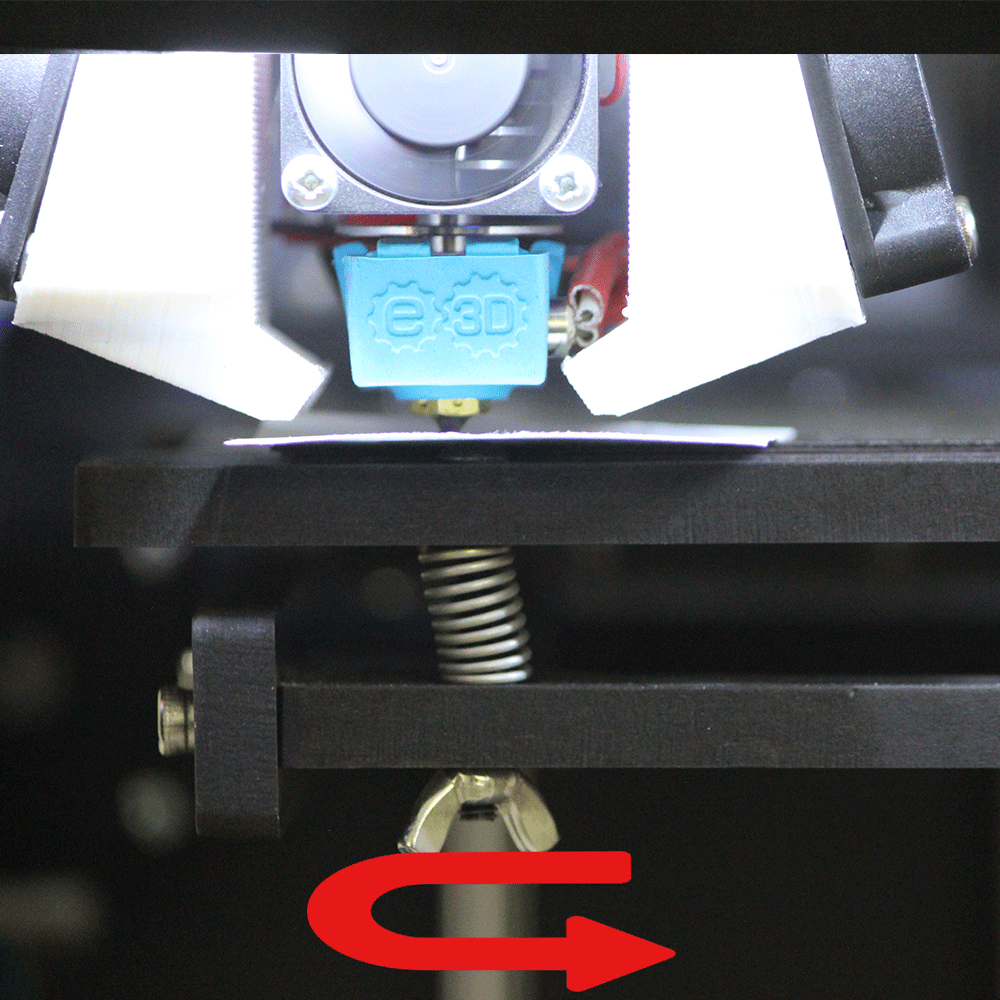
Take a piece of A4 sheet and slide it in between the nozzle and the print bed.
To level the bed correctly, the clearance between the nozzle and print bed should be equal to the thickness of the A4 sheet.
If clearance is more, the extruded material will not stick to the print bed - leading to a failed / warped print.
If clearance is less, then extruded material will not have enough space to come out of the extruder - leading to nozzle clogging or damaging the print bed.
To check the clearance, try moving a piece of A4 sheet between the clearance,
If the paper moves freely between the clearance, turn the screw clockwise to reduce the gap such that there is slight friction while moving the paper.
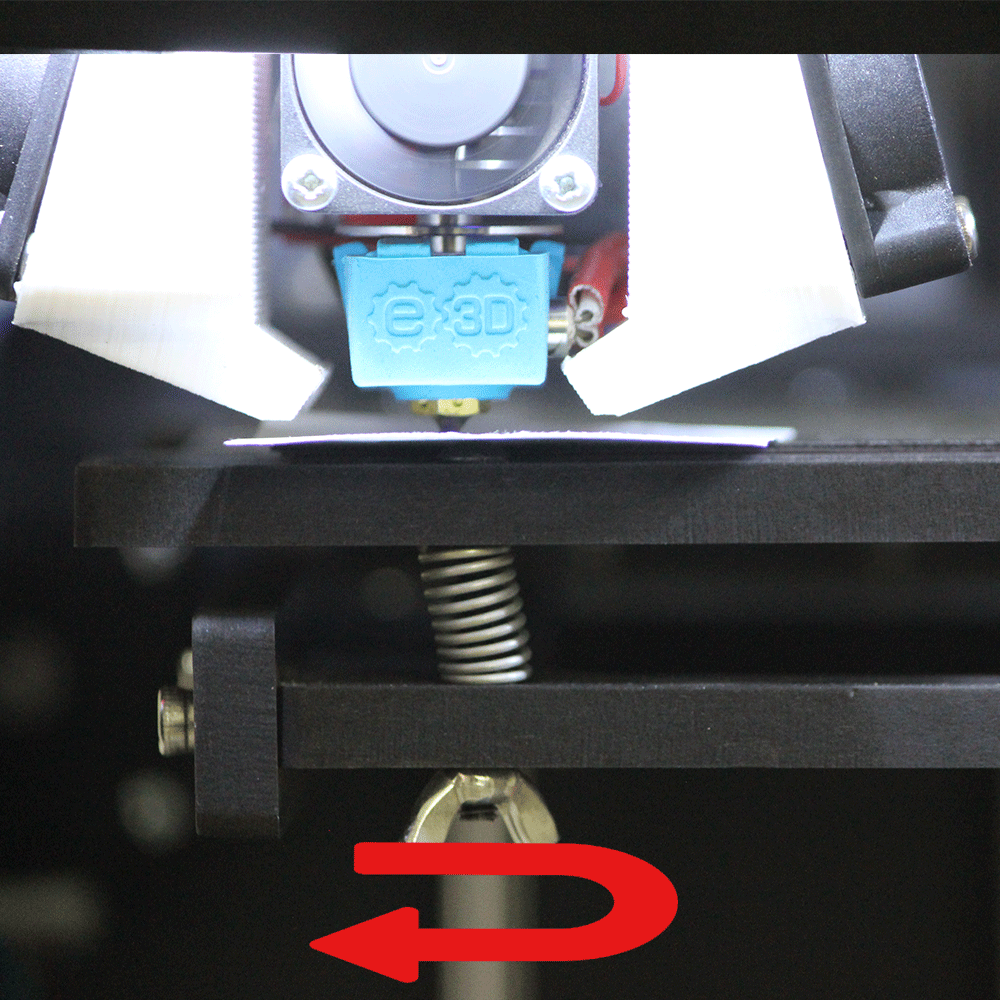
If the paper gets stuck in between, turn the screw anti-clockwise to increase the gap in such a way that there is a slight friction applied to the paper.
Follow the same process for all the other three corners in the print bed. This can be done by selecting the next corner option from the display.
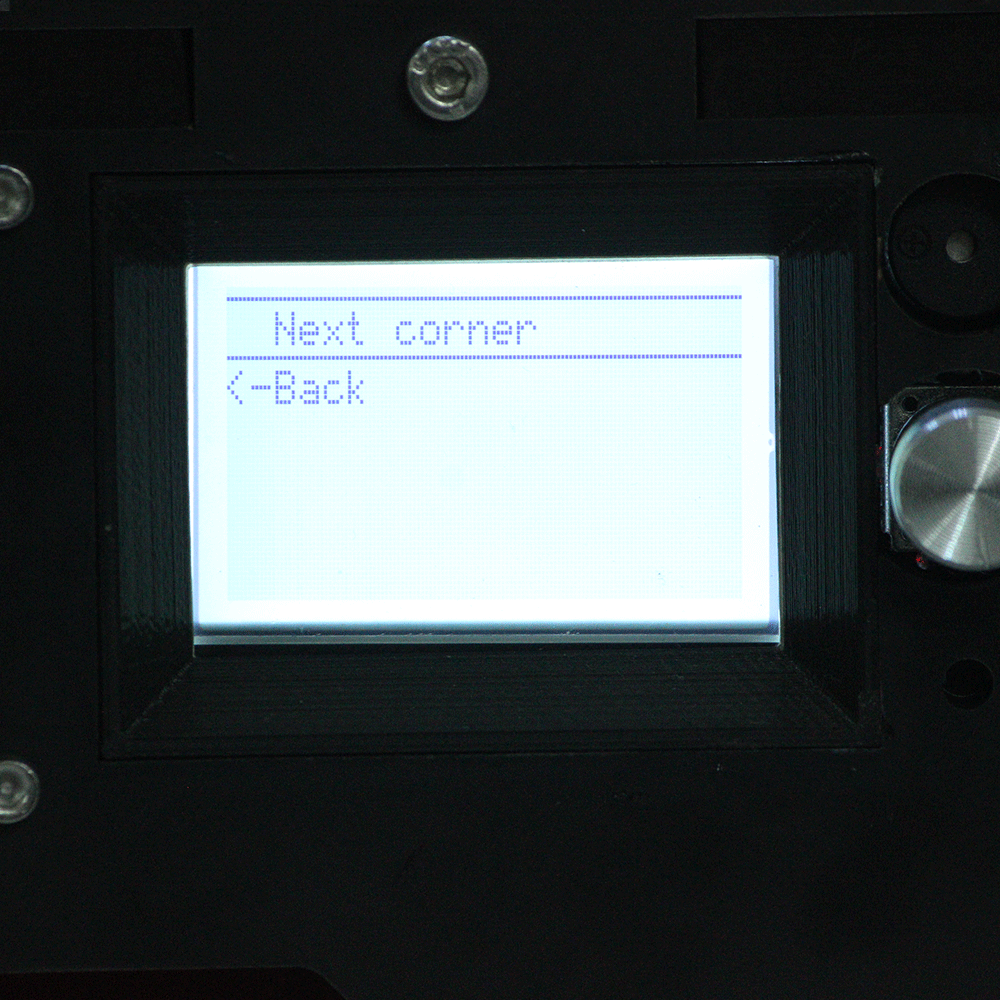
Once you have completed this process on all the four corners, the bed levelling is done.
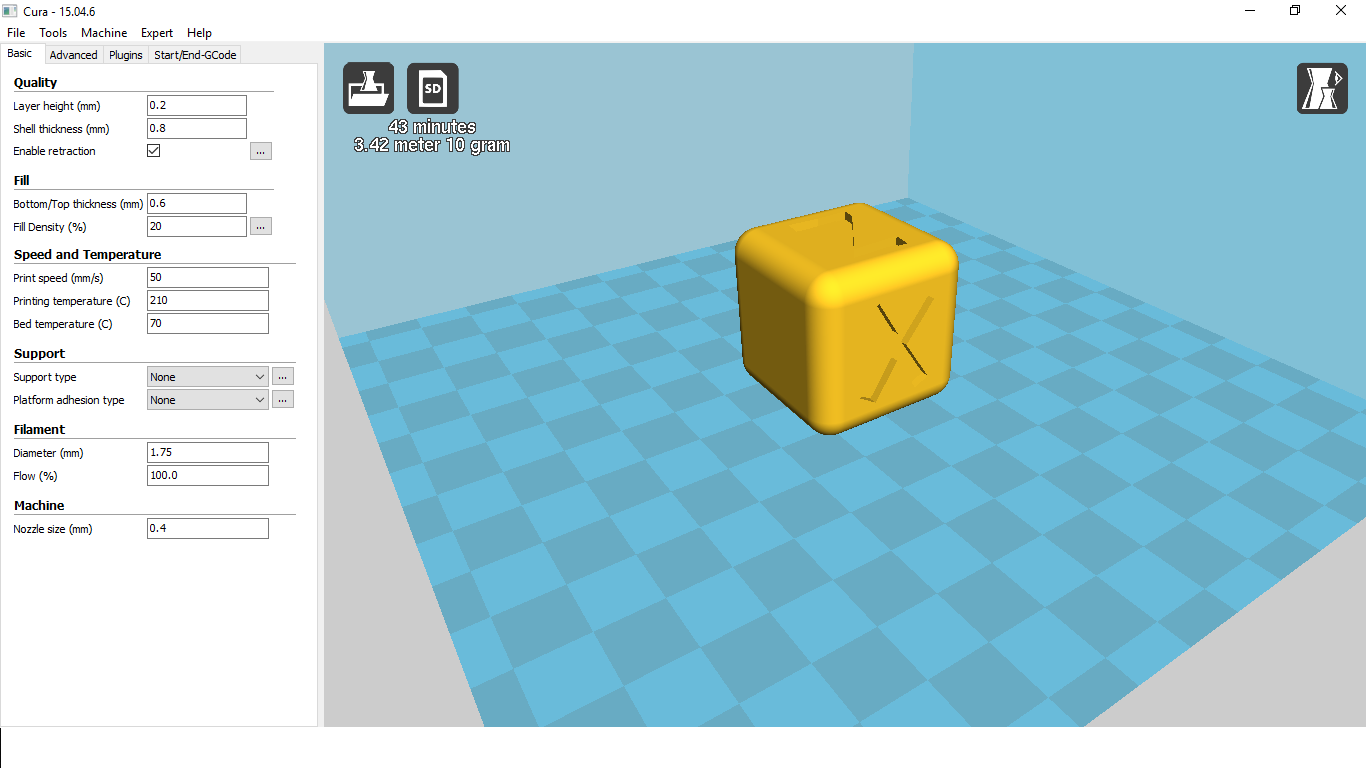
To 3D Print your model, you have to convert your 3D model file (.stl/.obj/.amf, etc) into a 3D Printable format (.gcode). This process is known as Slicing.
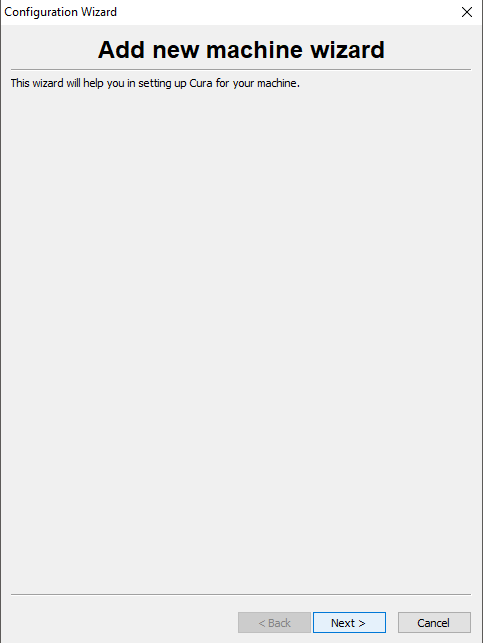
Install and open Cura from the SD card. we need to configure Cura for our FABX Pro 3D Printer.
The first time when you start Cura, a “Add New Machine” wizard will appear. Click on “Next” option. If you are seeing a “First time run wizard”, please select the language as English and then click on “Next” to proceed further.
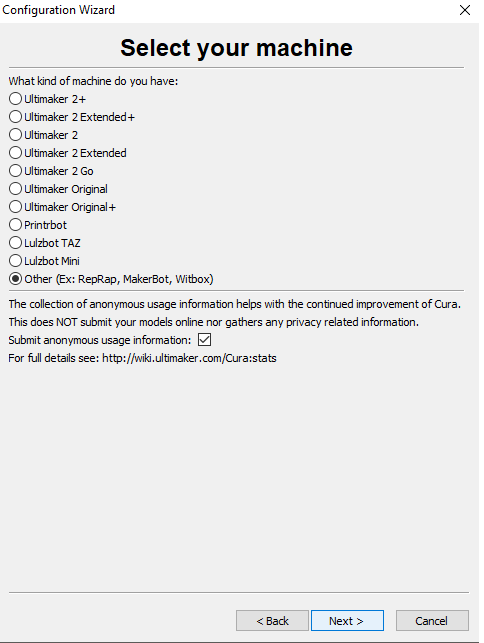
In the “Select Your Machine” wizard, select the “Other (Ex: Reprap, Makerbot, Witbox)” and click on “Next”.
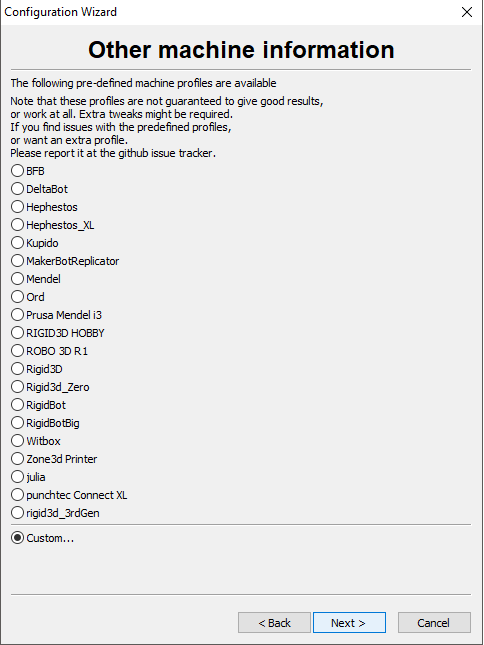
In the “Other Machine Information” wizard, if you are using a Macbook, you can simply click on “Next”. If you are using a Windows laptop, you have to make sure that the last option which reads “Custom” is been selected and then click on “Next”.
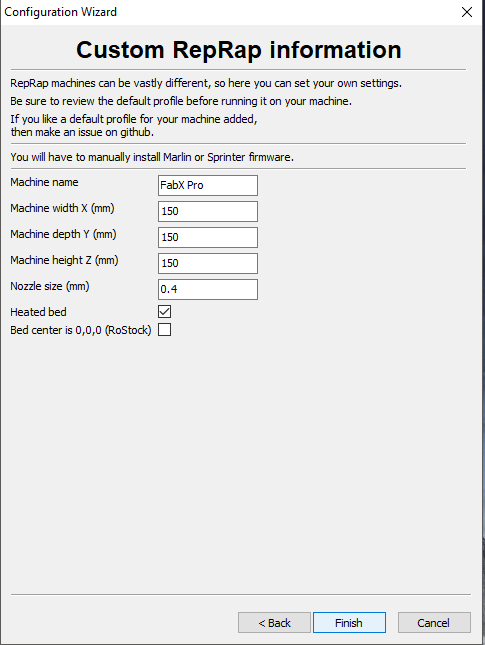
In the “Custom Reprap Information”, change the parameters as given below.
Machine name: FabX Pro
Machine width X (mm) : 150
Machine depth Y (mm) : 150
Machine height Z (mm) : 150
Nozzle size (mm) : 0.4
Heated bed : Enable the Checkbox
In the Cura slicing window, go to File→ Open Profile and select the “FabX Pro Config (PLA).ini” file from the SD card to load the custom FabX Pro profile.
Now Cura is configured for FabX Pro 3D Printer.
Load the sample file named XYZ_Cube.stl file given in the SD card.
Now Cura will slice the model and show the printing time below the load icon on the top
Select the “Export to SD” option on the top. After exporting, eject the SD card.
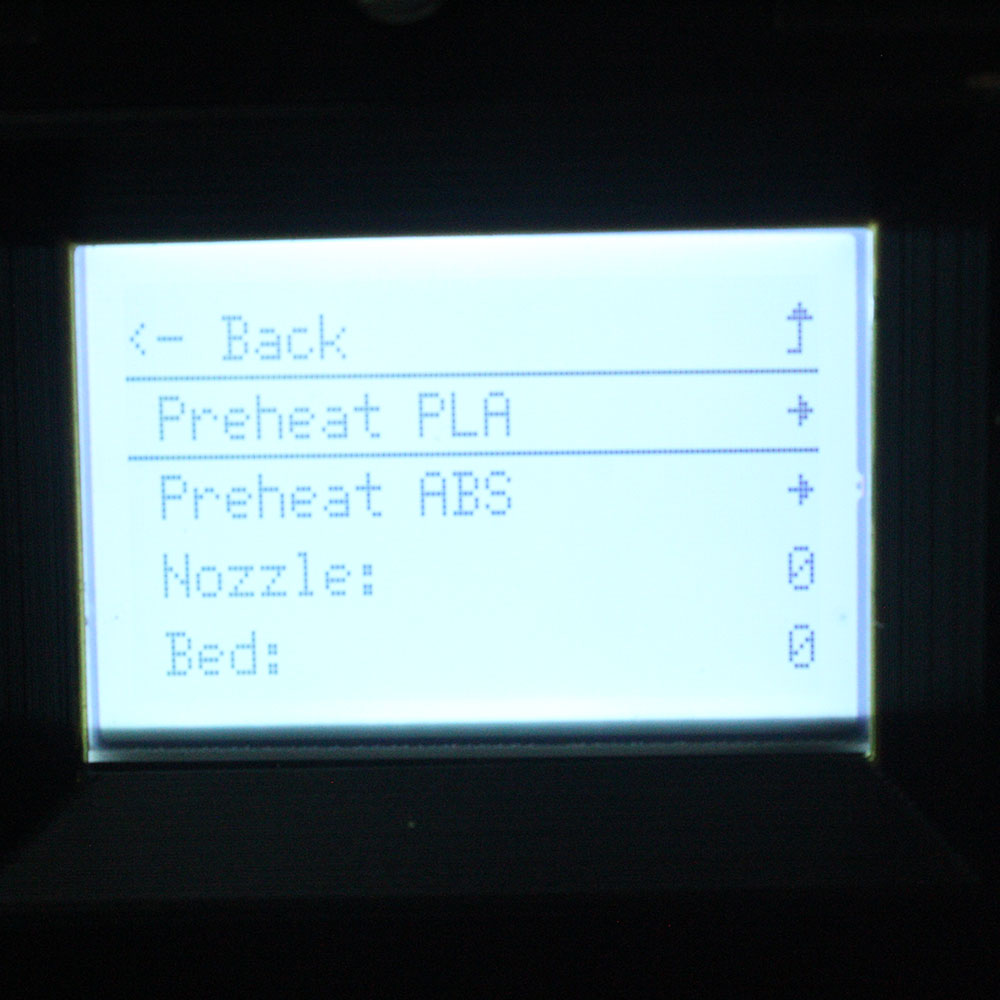
Press the knob once from the infoscreen and select “Temperature” -> “Preheat PLA” -> “Preheat PLA End” option.
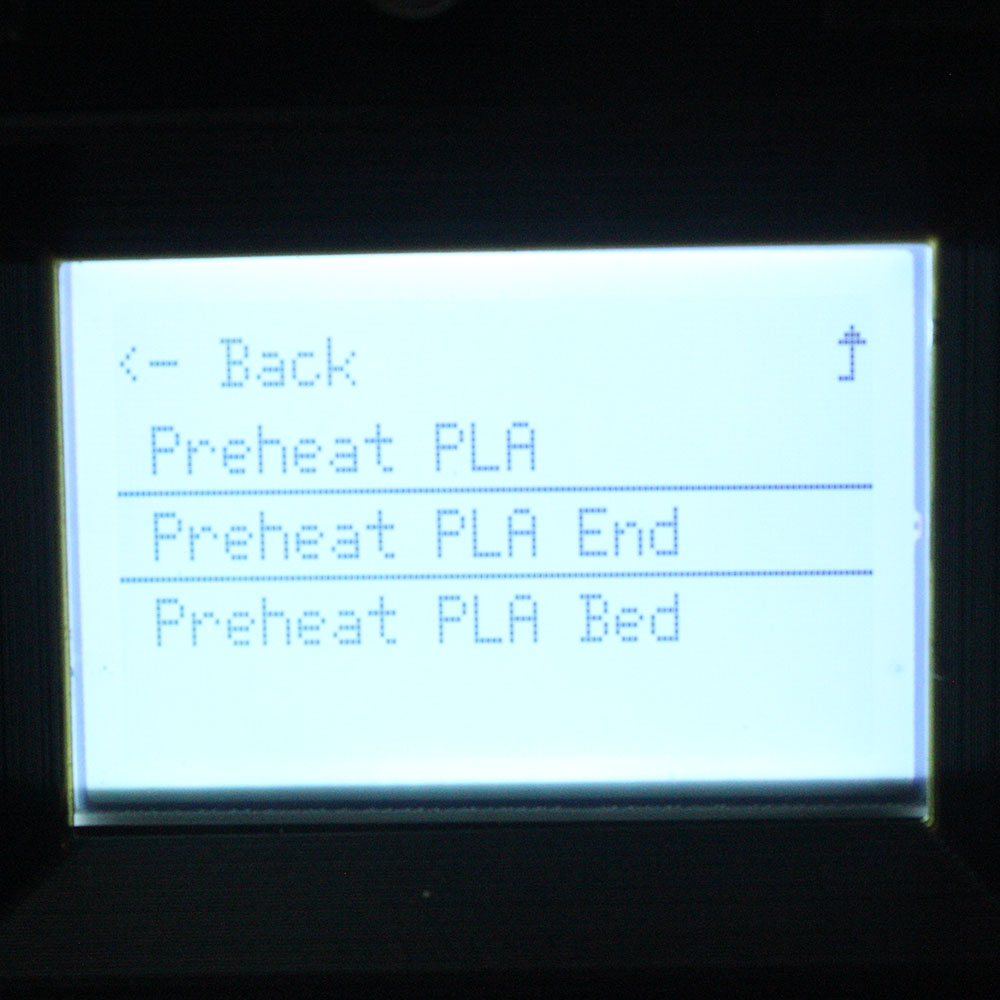
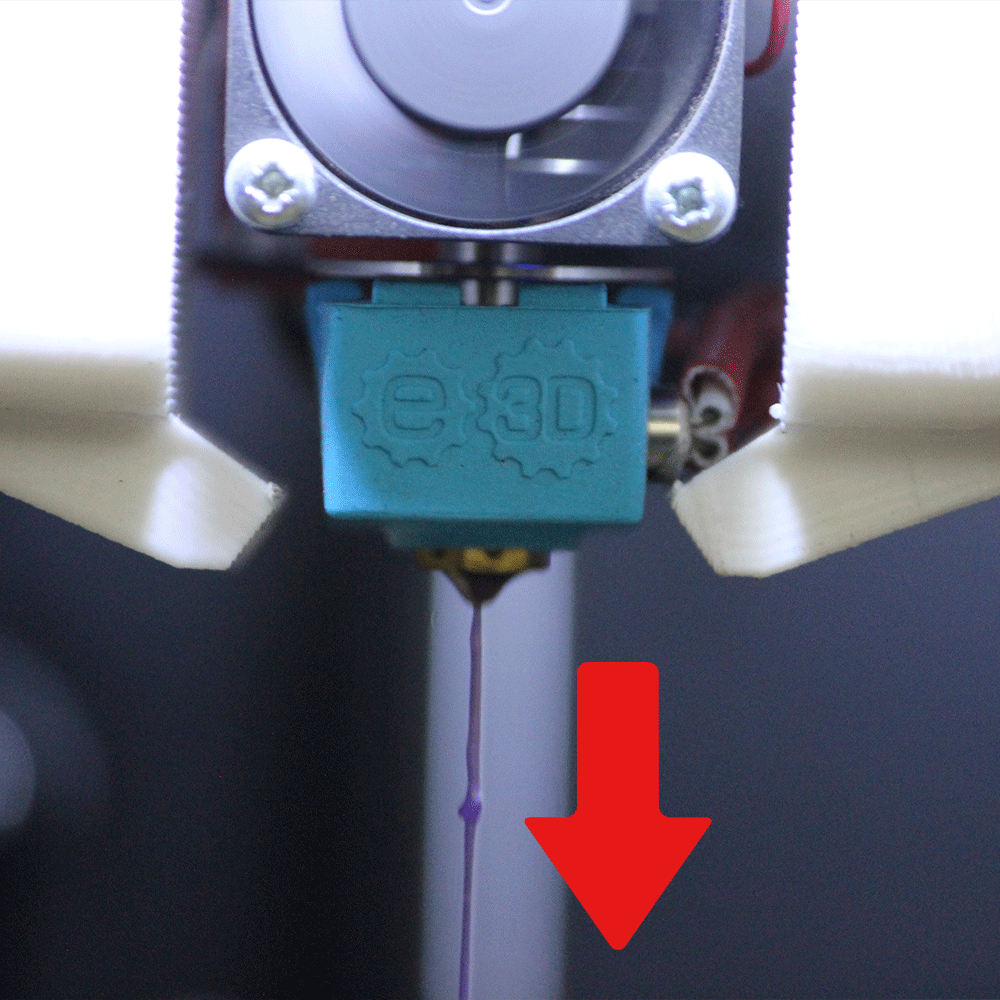
After the print head reaches 210 Degrees, push the filament from the feeder on the back until the filament is extruded from the nozzle. Now the filament is fully loaded into the printer for 3D Printing.
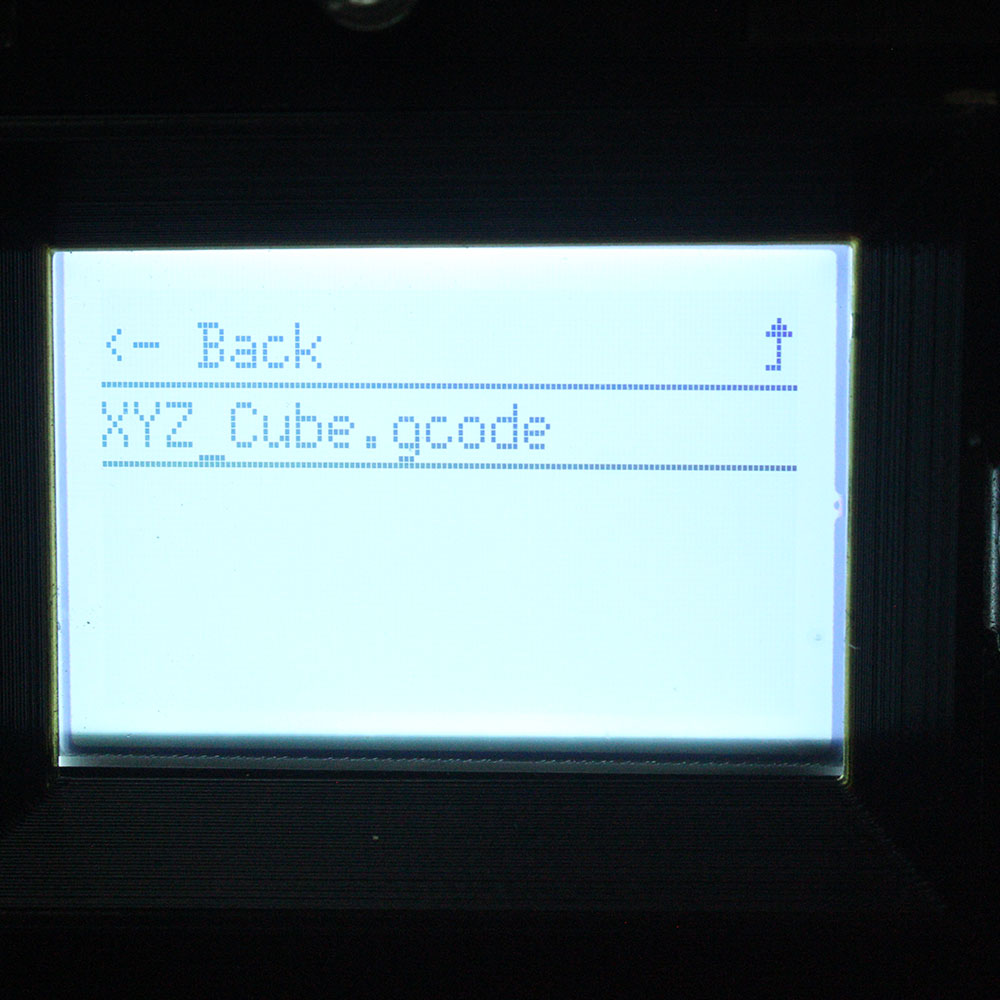
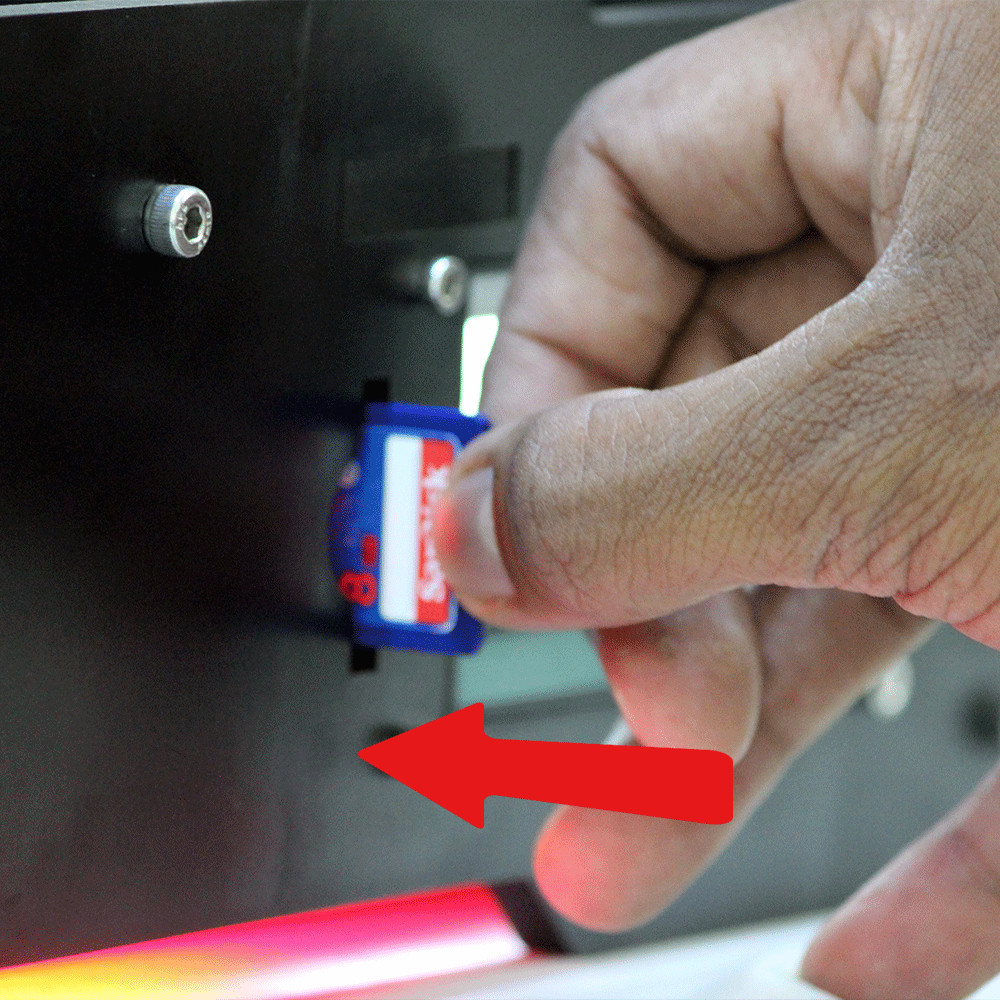
Insert the SD card in the SD card slot near the Display in the 3D Printer.
Rotate the knob to move down and go to the “Print from SD” option. Click once to see the files in the SD card and select the XYZ_Cube.gcode to start the first print.