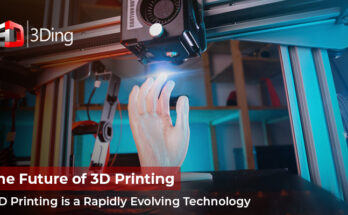
3D printing may be used to create new lithophanes from existing artwork or photographs. How do these incredible pictures come to be, and what is the process for creating your own?
Lithophanes allow you to effectively 3D print your most treasured recollections. You may have a 3D print of your favourite photo in a flat, basic frame, or you can get it in the form of a lamp or even a globe. And with the aid of modern web resources, 3D printing your own unique lithophanes is easier than ever before. Here you’ll find detailed instructions for utilising the Lithophane creator to design, customise, and 3D print your very own lithophane.
Definition of the term lithophane
The Greek terms litho, meaning “stone,” and painting, meaning “to make something to emerge,” are the basis for the modern English word “lithophane.”
One way that a lithophane can be used is to alter the quality of light that enters through it. In other words, it generates a height map of the picture, with the darker portions having a bigger cross-section and letting less light through, and the brighter areas having a thinner cross-section and letting more light through. The end result is a backlit black and white picture.
In the 1800s, porcelain cast in wax moulds was used to create the first lithophanes. However, thanks to CNC and 3D printing technology developments, it is now feasible to make a lithophane in the comfort of your home.
Creator of Lithophane
There are a number of tools available on the website Lithophane Maker that will assist you in creating your own unique lithophane for 3D printing. Thomas Brooks created one of the top resources for lithophanes in 2018 with his website. Lithophanes may be made in one of eleven distinct styles.
This post will explain how to use the Lithophane Maker website to 3D print a framed lithophane. We will also learn how to troubleshoot any difficulties that may arise as we go through the process of prepping a lithophane for 3D printing. The foundational principles need to be established first.
Make Ready for an Image
Making ensuring you have a high-quality photograph is half the battle when working with lithophanes. Lithophanes bring attention to the brighter parts of an image while concealing the darker ones. To distinguish between the many tones in the picture and to have sufficient clarity, a good lithophane image will have strong contrast and a high degree of sharpness.
Choose a high-contrast picture for your lithophane 3D printing projects. For all of the image’s shadow details to be seen, it has to be bright and crisp. The higher the resolution of your image, the higher the quality of your 3D-printed lithophane will be.
Making a Choice About a Design
When you’re ready, upload your photo to Lithophane Maker and choose a template. The website has a variety of layouts, from which you can choose to print anything from a box to a lampshade.
If you want to 3D print anything specific, just choose the model you like most and click on the Best 3D Printers in India. In this piece, we’ll take a look at the Flat Lithophane feature, which, much like a picture, produces a flat lithophane that may be framed or unframed.
Conclusion
In this article, we have discussed the basics of lithophane and all you need to know about it. If you wish to learn more, you have the option of getting in touch with us. Contact 3d printing Services in Chennai and let us put our expertise to use for your 3D printing needs.